Seed Saving 101
I know you have been busy in your garden with watering, harvesting, fighting the pests and you thought it was almost time to sit back and take a breath! Not quite yet! You need to save those seeds! Seed saving has become such an important part of gardening to me. Let me explain why.....
Back when "Covid" hit and I was waiting in line to visit my local Home Depot, when it was finally my turn to go in and make my purchases, I noticed there were some items that were taped off and marked as "non-essential." Seeds were one of those items and while they have become fairly easy to find since that time, I decided that I did not want to get caught "seedless" ever again!
Another reason to save seeds is that when you pick the best plant with the best fruit, you are almost guaranteed to have a healthy plant stock the next year. If you have volunteer plants that come up, saving those seeds is a great idea! Those seeds have shown themselves to be very hardy and well-adapted to your particular area.
I used to be intimidated by the idea of saving seeds, but now it has become fun and I get more excited about growing plants from the seeds that I personally harvested myself.
There are some overall rules that pretty much apply to all seeds. First and foremost, be sure that you choose healthy fruit from healthy plants. Be sure that the seeds are completely dry before putting them away. I lay mine out on paper plates and label label label! I always think that I will remember what plant a seed belongs to but when they turn brown and dark, it can become very confusing.
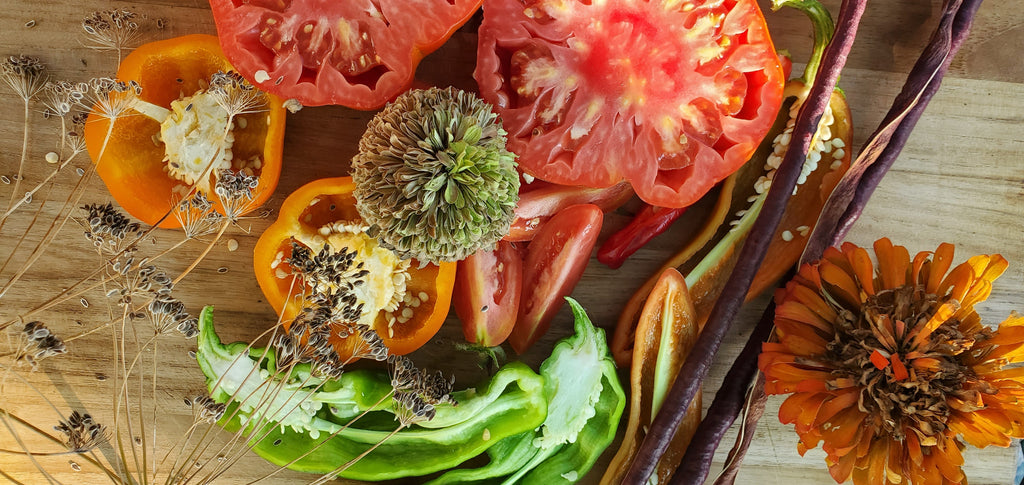
Zinnia seed saving is a must for me as I have, over the years, accumulated so many different varieties. This year my garden burst with color from these beautiful flowers. The seed for flowers can be found in the flower head itself, so just pull those heads off when they mature and start to dry and lay them on a paper plate.
Beans are easy to dry. Let some beans that have grown too big to stay on the plant until they begin to turn brown and then harvest them and let them continue to dry.
Peppers are pretty easy as well. I just cut the pepper open as shown in the picture above and let it all dry out.
Herbs such as the Mammoth dill that is pictured is already pretty dry. I will let it sit out a bit more just to be sure before storing the seeds away.
I have wonderful way of saving tomato seeds that has proven to be a success for me every time! I take a small pot of dirt and slice a tomato on top just like you would slice one for a tomato sandwich. Cover with a sprinkling of dirt and put away in a dark, cool place. DO NOT WATER! Leave this pot put away until it is time to start seeds in the spring. Bring it out and water it and voila! You will have more tomato seedlings than you know what to do with! I pick my favorite tomato varieties every year and start the seedlings this way. When the plants start to grow, I pick them apart and replant them in their own little pots.
Even if you don't save all of your seeds, pick your favorite fruits and try it this year. There may come a time when we will need those seeds and the knowledge on how to save them may be essential. You can look forward to healthier plants and you may have some cross-pollination that results in a new favorite like I did with a beautiful pepper plant this year. I hope this inspires you to go out and save some seeds!
Let's Save Seeds Together!
Julie Atkins
Milkweed Farms


