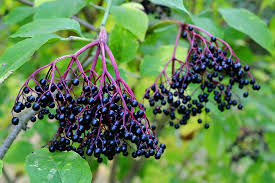
Get Through Winter By Making Your Own Elderberry Syrup!
When the cold and flu season hits, elderberry syrup is a staple in our home! The concoction that I make at home is so much less expensive and tastes a whole lot better than the store bought.
I planted 5 elderberry bushes last spring, however, it takes about 3 years to get them to produce berries. While I am waiting for my little bushes to grow, I actually purchase the berries that I use from Amazon. I prefer Frontier Co-op Elderberries but there are quite a few brands available. I have found that this particular brand has less stems and are cleaner than some others that I have tried.
My recipe is really simple and is not time consuming. Once you have tried making it, you'll never go back to buying Elderberry Syrup!
I do have a quick warning! Don't eat elderberries raw. They must be cooked or they can cause nausea, abdominal cramps and possibly vomiting. But cooked.......they are the bomb!
My simple recipe for making syrup is as follows:
1 cup of dried elderberries
4 cups of water
1 large knuckle of ginger, sliced
2 tsp cinnamon
1/4 tsp cloves
1 tsp nutmeg
1 cup honey (Honey sweetness can vary so it is important to taste test as you go) Also, the honey is important in the immune boosting process so be sure to buy local and buy it raw!
Add water, elderberries, sliced ginger, and spices to large pan and simmer for about an hour on low heat. As the elderberries soften, I use a spoon with holes to smash them against the side of the pan so that I get all of the yumminess out of them that I can. Allow the pan to cool and then strain the mixture to remove all solids before adding the honey and then bottle and store in the refrigerator. Mine stays good up to about 3 months.
Please do not consider this as medical advice. I am not a Dr. I just want to share with you how we care for our immune systems here in our home!
I can't wait for you to give this a try! Let me know how you love it!
Inspiring the well-lived home,
Julie Atkins
Milkweed Farms


